Individual assignment:
Write an application that interfaces a user with an input and/or output device that you made.
Introduction
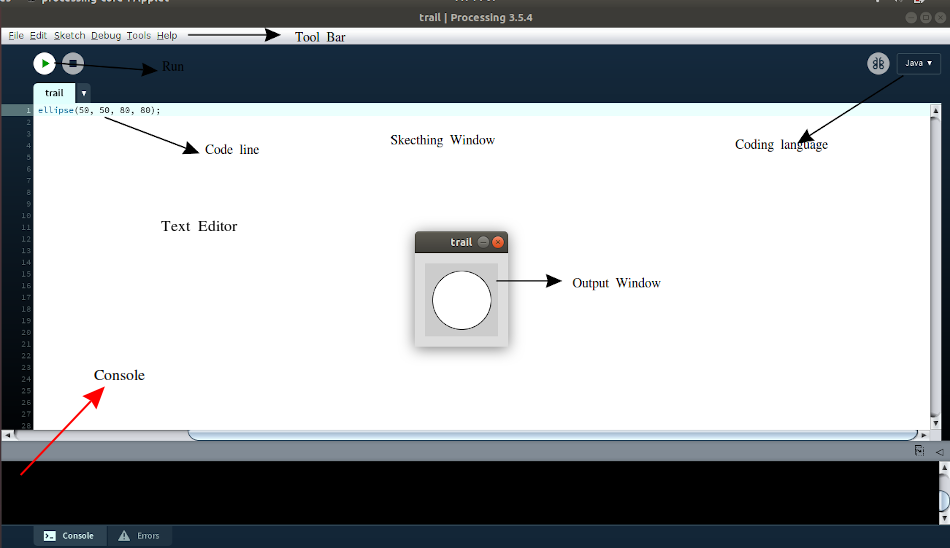
This week I designed and developed an interface using a servo motor with my input week’s board. I used the ‘Processing’ tool to create a GUI (graphical user interface)
Processing
Processing is a flexible software sketchbook and a language for learning how to code within the context of
the visual arts.
 Downloaded the packages from here
Processing usually uses Java Programming. It also supports python programming.
I started using java for the coding in processing. I have little knowledge in java and Tutorials available in processing helped me to build my application and finally to complete my assignment.
First I created an ellipse using below code line
ellipse(50, 50, 80, 80);
Then I tested an interactive one
void setup() {
            size(480, 120);
          }

          void draw() {
            if (mousePressed) {
              fill(0);
            } else {
              fill(255);
            }
            ellipse(mouseX, mouseY, 80, 80);
          }
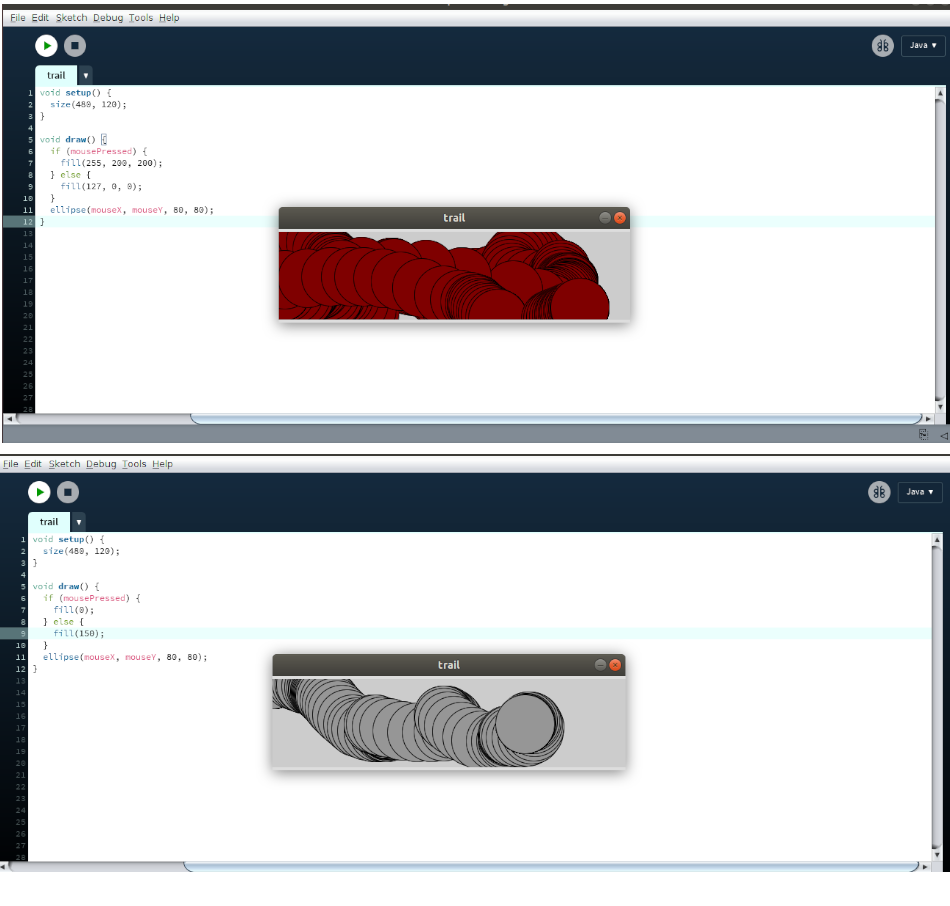
This program creates a window of size 480 pixel X 120 pixel.When a mouse button is pressed, the circle color changes to black. I also tried with red color, This can be done by changing values in the “fill()” function
My references
‣ Programming for my assignment
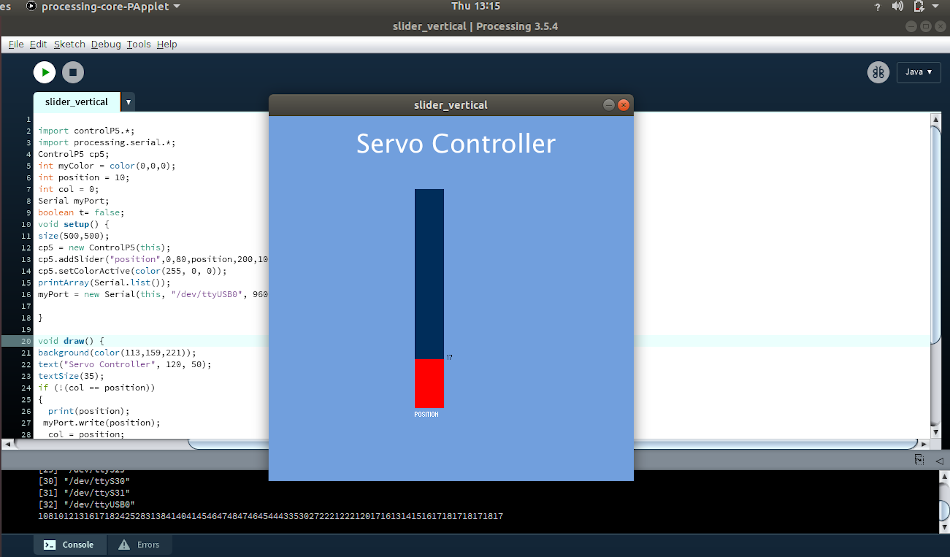
I intended to develop an application to control the servo motor. I designed a slider on the interactive window to send an angle value to the servo motor.
First I added library “controlp5” This helps to build a graphical user interface on top of your processing sketch like Sliders, Buttons, Toggles etc.
Click ‘Sketch” - select ‘ import sketch’ then add ‘ New library’

Some functions i have used is explained below
Syntax: addSlider(theName, theMin, theMax, theDefaultValue, theX, theY, theW, theH)
his function craetes a slider. A slider is either used horizontally or vertically. when adding a slider to controlP5, the width is compared against the height. if the width is bigger, you get a horizontal slider, is the height bigger, you get a vertical slider.
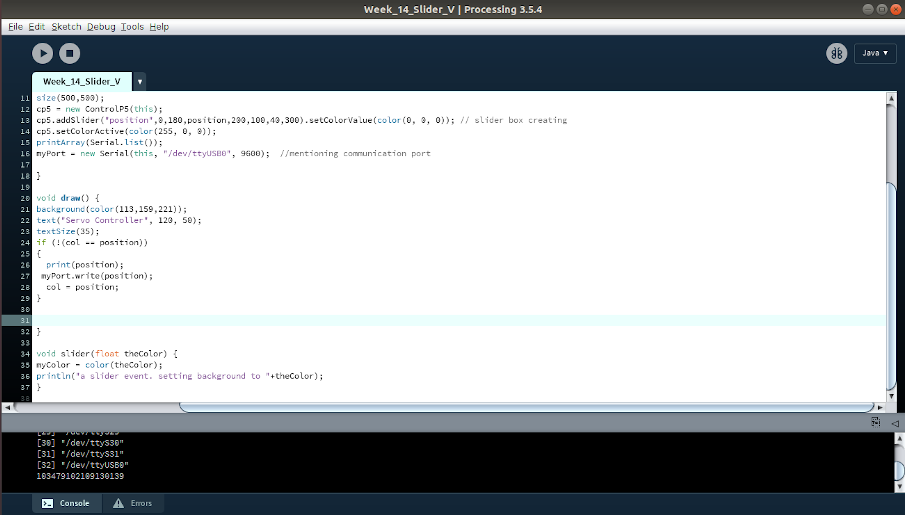
I created a vertical slider. cp5.addSlider("position",0,180,position,200,100,40,300)
myPort = new Serial(this, "/dev/ttyUSB0", 9600);
This code line set the communication port. For my ubuntu OS it is "/dev/ttyUSB0".
background(color(113,159,221));. This function set the background color.
Gets a list of all available serial ports.println() to write the information to the text window.
Send a data out the serial port
            import controlP5.*;
            import processing.serial.*;
            ControlP5 cp5;
            int myColor = color(0,0,0);
            int position = 10;
            int col = 0;
            Serial myPort;
            boolean t= false;
            void setup() {
            size(500,500);
            cp5 = new ControlP5(this);
            cp5.addSlider("position",0,180,position,200,100,40,300).setColorValue(color(0, 0, 0)); // slider box creating
            cp5.setColorActive(color(255, 0, 0));
            printArray(Serial.list());
            myPort = new Serial(this, "/dev/ttyUSB0", 9600);  //mentioning communication port


            void draw()
             {
                background(color(113,159,221));
                text("Servo Controller", 120, 50);
                textSize(35);
            if (!(col == position))
                {
                 print(position);
                 myPort.write(position);
                col = position;
                }

            }

            void slider(float theColor)
            {
                myColor = color(theColor);
                println("a slider event. setting background to "+theColor);
            }
‣ Programming the ATtiny 84 board
I used my input week’s board for assignment. Using Arduino IDE I uploaded a simple program for servo sweep. The input angle is received from application through FTDI. Declare the serial communication port, select the proper board’ ATtiny 84’,’ internal clock 8 MHz’. I declared Pin 12 of Attiny 84 for PWM.
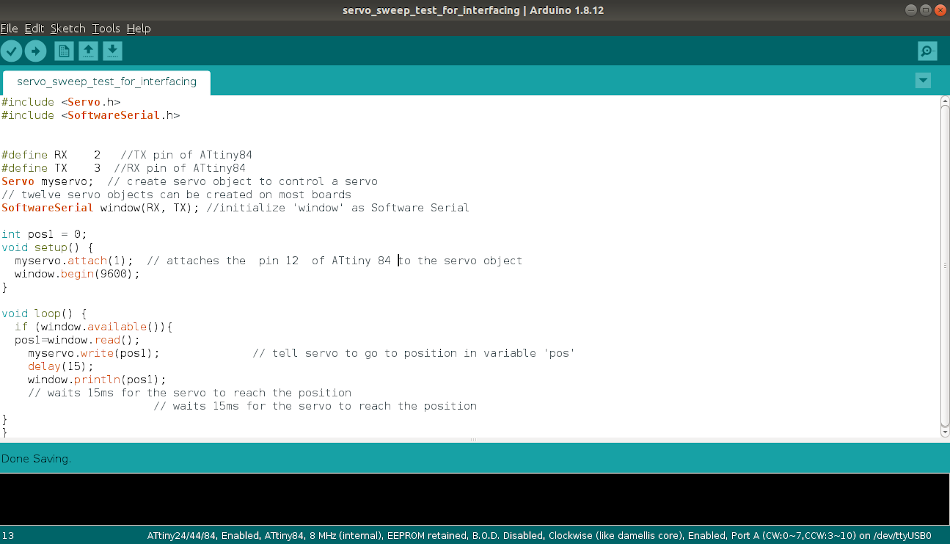
Arduino Code
#include#include #define RX 2 //TX pin of ATtiny84 #define TX 3 //RX pin of ATtiny84 Servo myservo; // create servo object to control a servo // twelve servo objects can be created on most boards SoftwareSerial window(RX, TX); //initialize 'window' as Software Serial int pos1 = 0; void setup() { myservo.attach(1); // attaches the pin 12 of ATtiny 84 to the servo object window.begin(9600); } void loop() { if (window.available()){ pos1=window.read(); myservo.write(pos1); // tell servo to go to position in variable 'pos' delay(15); window.println(pos1); // waits 15ms for the servo to reach the position // waits 15ms for the servo to reach the position } }
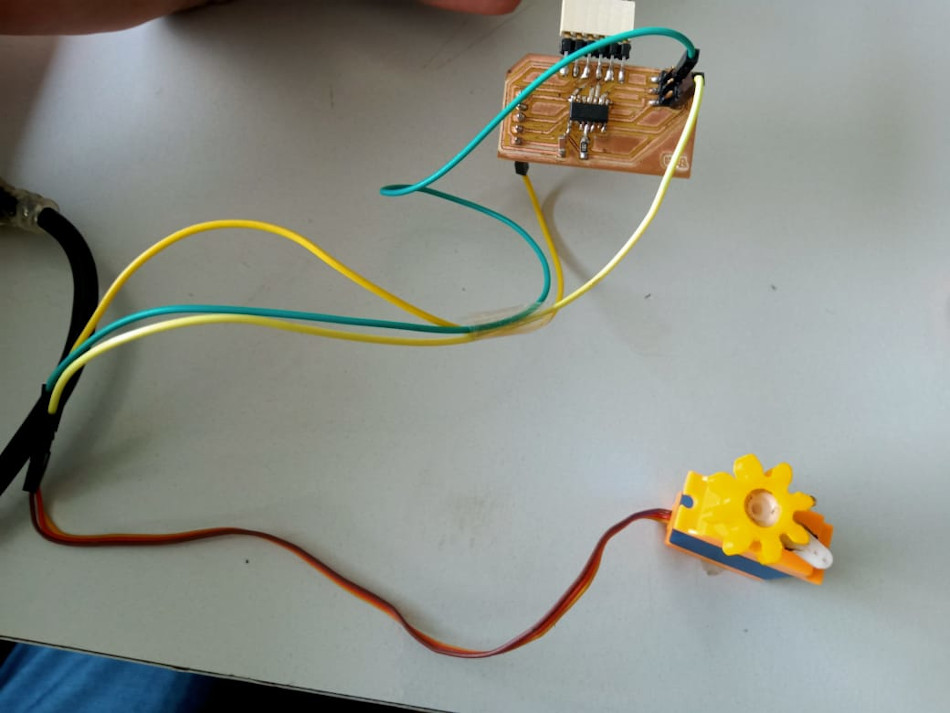
Interfacing Application, Board and Servo motor
After coding the board we can connected the board using FTDI cable.From board to servo motor i used jumper wire. I refered my input week schematci diagram for identifying the pins.
Working Video
Group Assignment
Compare as many tool options as possible.
Link to week13- Networking and communication grop assignment page